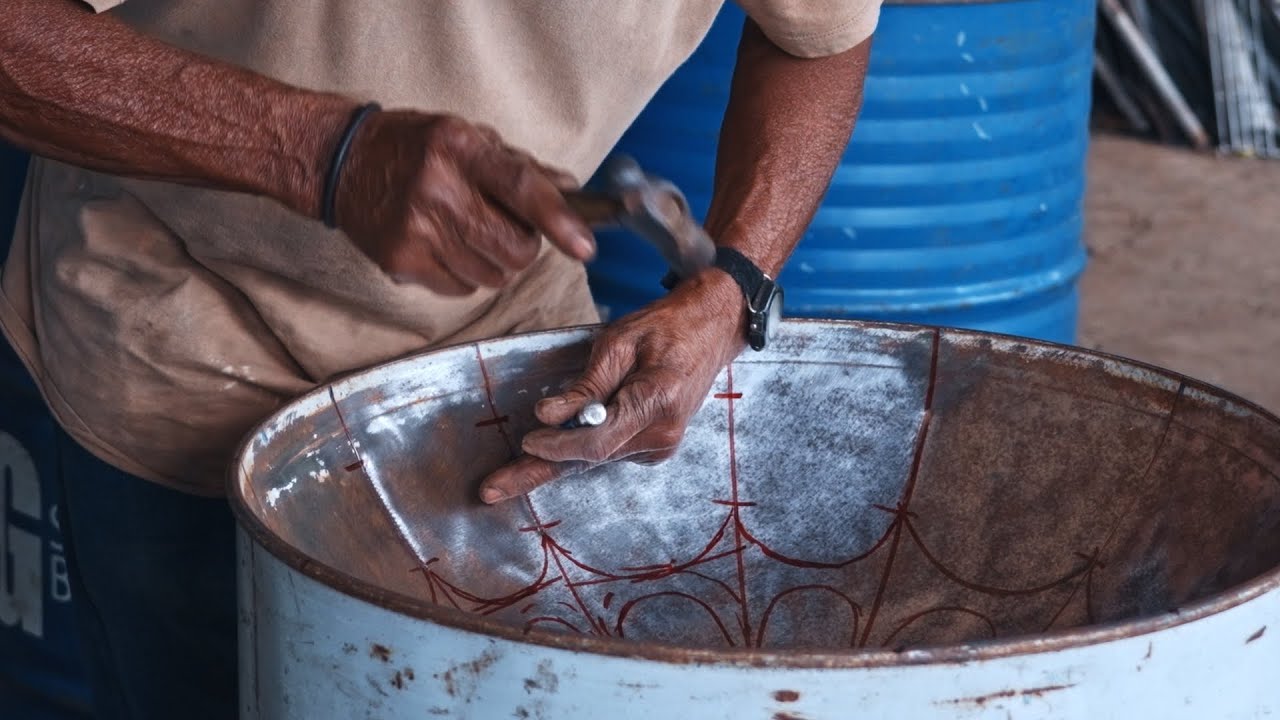
Steel drums, also known as steel pans, are unique musical instruments originating from Trinidad and Tobago. Their vibrant, resonant sounds have captivated audiences worldwide. Crafting a steel drum requires skill, precision, and patience. Here's a comprehensive guide on how to make your own steel drum... but it ain't for the impatient folks.
Materials and Tools Required
- Steel Drum Barrel: Typically, a 55-gallon oil barrel is used.
- Sledgehammer: For sinking the drum.
- Chisels and Punches: For grooving the notes.
- Tuning Hammers: For fine-tuning the notes.
- Burner or Heat Source: For tempering the steel.
- Metal Files and Sandpaper: For smoothing the surface.
- Markers and Templates: For marking note areas.
Step-by-Step Process
1. Selecting and Preparing the Barrel
Choose a clean, unpainted 55-gallon steel drum barrel. Remove any residues or contaminants from the interior and exterior of the barrel.
2. Sinking the Drum
Place the barrel upside down. Using a sledgehammer, carefully hammer the center of the bottom of the barrel to create a concave shape. This process is called "sinking." The depth should be around 6-8 inches, depending on the size and type of steel drum you wish to make (e.g., tenor, double second, bass).
3. Marking the Notes
Once the drum is sunk, use a marker to draw the layout of the notes on the surface. This requires precision and knowledge of the musical scale you want. Templates are available for different types of steel drums to ensure accuracy.
4. Grooving the Notes
With chisels and punches, carefully groove along the marked lines to define each note area. The grooves should be deep enough to separate the notes but not too deep to damage the structural integrity of the drum.
5. Tempering the Steel
Heat the entire drum evenly using a burner or other heat source. This process, known as tempering, strengthens the steel and improves the sound quality. Allow the drum to cool slowly to avoid any warping.
6. Tuning the Notes
Using tuning hammers, start fine-tuning each note. This step is crucial and often requires an experienced ear. Strike each note gently and adjust the tension by tapping around the grooved areas until the desired pitch is achieved.
7. Smoothing and Polishing
File down any rough edges and sand the surface to smooth out any imperfections. This not only improves the aesthetics but also ensures better sound quality.
8. Final Tuning and Testing
Re-check the tuning of each note and make any necessary adjustments. Play scales and simple tunes to ensure each note resonates correctly.
9. Adding the Finishing Touches
Paint or decorate your steel drum as desired. Applying a clear coat of lacquer can protect the metal and give it a shiny finish.
Tips for Success
Practice Patience: Crafting a steel drum is a meticulous process that cannot be rushed.
Seek Expertise: If possible, work with an experienced steel drum maker to learn the nuances of tuning.
Use Quality Materials: High-quality steel and tools will significantly impact the final sound and durability of your instrument.
Creating a steel drum instrument is a rewarding endeavor that combines artistry and craftsmanship. By following these steps, you can produce a beautiful, resonant steel drum that reflects both your dedication and the rich musical heritage of the Caribbean. Whether for personal enjoyment or performance, your handmade steel drum will be a testament to the timeless allure of this unique instrument.


